Preventing Injuries in the Mountain Athlete
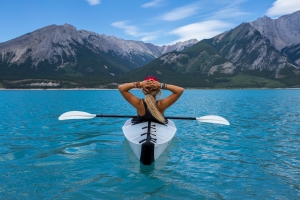
The Great Outdoors.
It is there for you to enjoy, to push your limits, and develop fortitude.
For some people, going outdoors can be synonymous with developing injuries, but there are steps you can take to mitigate future injuries from taking place.
The Right Fitness Level
Greater fitness leads to a better understanding of your limits, as well as the ability to achieve greater feats.
A physical assessment by a good therapist or strength and conditioning coach can help you sort through the thousands of exercises out there to know which ones are relevant to your needs.
Some general considerations are:
Slow, gradual increases in exercise and specific training are necessary (months and/or years). Our bodies adapt well to gradual stresses, but if too much load is placed on it at once, expect failure and injuries. It takes great dedication to yield great results. Most outdoor athletes peak in their 30s and 40s as they build cardiovascular endurance, muscular endurance, and a resistance to injury.
Outdoor athletes often suffer overuse / over-training. It is important to consider whether you have proper body mechanics during training and outdoor pursuits. Have knowledgeable therapists, coaches and other athletes watch your form and provide suggestions. It is also important to include adequate cross-training, regular body maintenance (physiotherapy, massage, rolling), proper nutrition, and adequate rest.
As a general rule there are certain joints which must be stable (strong ligamentous and muscular support around the joint, which prevents excess joint motion) and others which must have good mobility (the joint is built to be very flexible, however the muscular support around the joint must be able to control this increased range). As pertaining to lower body exercise, the core must be stable, hips must be mobile, knees must be stable, and the ankles must be mobile.
A small exercise program to try…
Try adding the following 20-minute routine into your regular workouts, three days a week.
It is a small corrective exercise program built to help the user become more aware of hip / knee / ankle positioning during single leg stance.
It is not meant to replace regular strength training. Rather, it should enforce the principles of joint alignment, feeling posterior chain engagement and will allow good transfer to outdoor pursuits.
Dynamic stretching
Perform dynamic stretching prior to exercise for 30 seconds per muscle group. A few lower body ideas include front/back and side-to-side leg swings, quick quadriceps stretches, quick piriformis/glute stretches, and hopping.
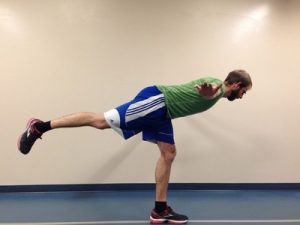
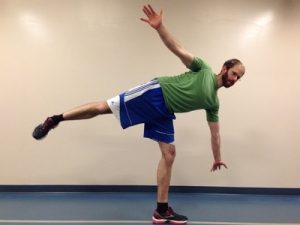
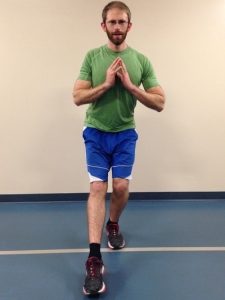
Airplane
At first you may need to hold onto something for balance, but eventually you should be able to progress to no hands.
Goal = 10 reps per side.
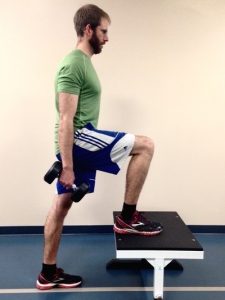
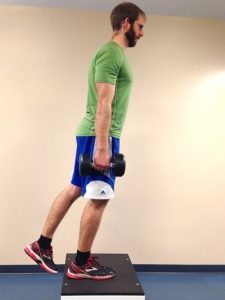
Step-ups
Face a mirror and line up the hips and knees on the working leg to be approximately 90 degrees. Ensure that during the exercise, your knee tracks straight (not allowing it to collapse inwards or outwards).
Lean forward, try to feel your glutes and hamstring fire on the upper leg then push through the heel on the working leg as you step up (this will help you to activate the posterior chain).
Goal = 10 reps per side, with 2 times the expected weight of your backpack and gear.
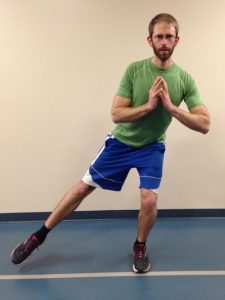
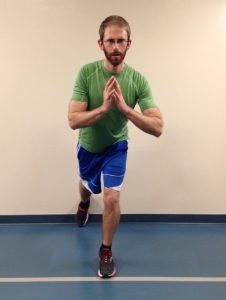
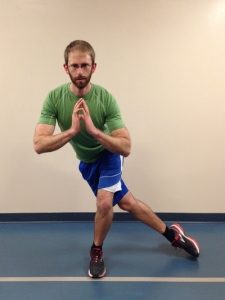
Single leg star balance
Reach as far in each of the four directions as possible, while bending the stance leg at the hip and knee during the reaching phase (this leg should remain straight in line from the hip to the foot).
Goal = 10 reps for each leg. 1 rep = a full cycle of the four directions.
Side note: Work to create symmetry in this test, as evidence suggests that a difference of more than 4 cm between left and right legs in ‘the forward reach’ component can help predict whether an athlete is at risk of injuring the leg. Tip: Place masking tape on the ground and mark the distance in centimeters.
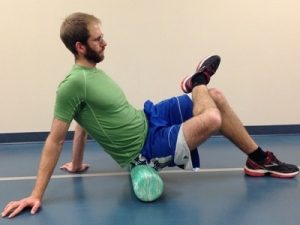
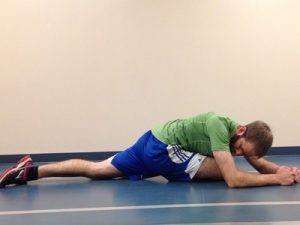
Piriformis rolling and pigeon stretch
1 minute rolling, 1 minute stretch per side.
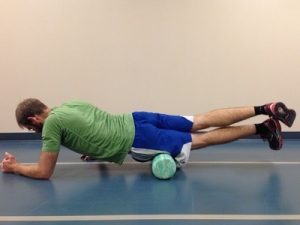
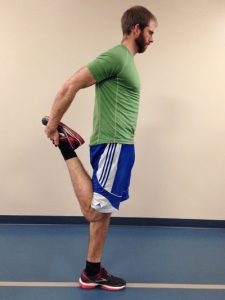
Lateral quadriceps rolling and stretch
1 minute rolling (focus on the outside of the leg), 1 minute stretch per side.
Other important considerations
Start With The Right Intel
- Create specific training goals: How many days/hours, what gear do I need to use, am I familiar with the terrain?
- Become efficient and effective in your skill-set by learning the best decision making skills and techniques via free resources (friends, books, videos), and progressing to courses or hiring a guide.
The Right Gear
- Hiking poles take up to 25% of stress off your knees during the descent and help your legs save energy. They also improve your balance on technical terrain.
- Boots that fit well can prevent crushed toes, and rolled ankles.
- Bring microspikes, mountaineering gear and/or avalanche gear if you expect snowy conditions.
Expert Contributor
JACOB CARTER, LEAD

